
The ‘Shanty’ Wine rack will surely interest you, if you are a wine lover who likes to keep his beauties in full public glare. Fix a time slot for this Sunday afternoon, to make this very sturdy and compact wine rack.

The Shanty wine rack when finished will look rustic and compliment your vintage wines perfectly. And the whole project will burn your pocket with a small hole of $15 only. Collect the following materials and tools beforehand in order to waste no time at the execution stage. You will need a wooden plank 2×6 cut at 38” and five smaller pieces 2×4 cut at 10”. Ensure that you have 10 – 5/16 x 4 1/2″ hex bolts, and 10 – 2 1/2″ wood screws. As obvious you will need glue for wood, tools for finishing. Use a well loaded and stable saw to make the cuts. We recommend tthe Ryobi 10″ compound miter saw, to make neat cuts.

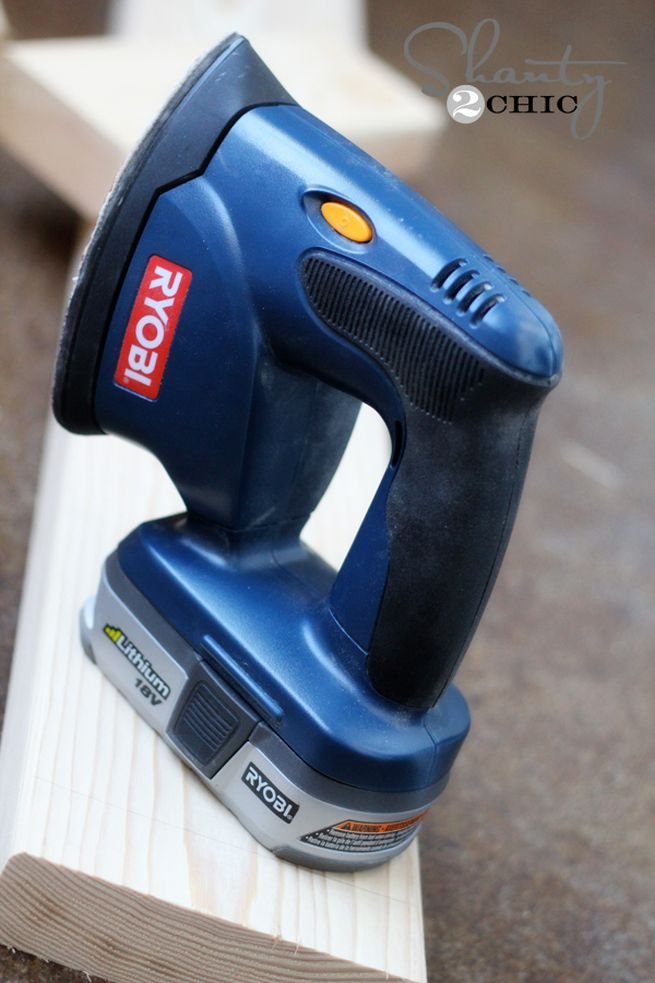
Don’t be in a hurry to attach the pieces, remember finishing is very important. Pour yourself a drink and sand all he corners and edges before attaching them. When looking for fine finishing tools go for the Ryobi’s 18V ONE+ Corner Cat Finish Sander, you will be surprised by the end product.
The edges should be as smooth as butter and look somewhat like this.

The marking of the board is the next critical step. Start by making marks on the 2×6 board. Mark a 2×4 piece at every 6”. Make sure you draw a line above and below the 2×4. You need to repeat the markings on both sides of the board.

Before you actually attach the 2×4’s to the 2×6, drill holes in the front and top of every 10” piece. Try and be as close the edge as you can, in order to accommodate bottles of all sizes. The Ryobi 18V Lithium-Ion Drills is perfect for this part, as it is so easy to handle and makes drilling seem like a stress buster. It is extremely lightweight and even your wife and young kid can handle it and make it seem like a successful family project.

Now comes the sticky part, draw lines of wood glue on your 2×4 and clamp them hard on the 2×6 where the liens were drawn earlier.

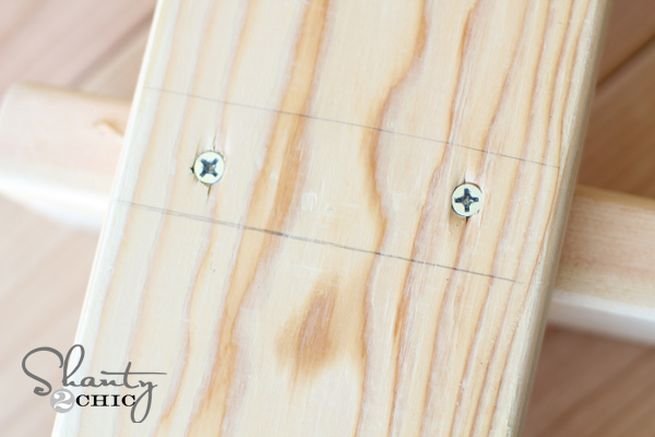
Don’t forget to drill 2 holes at the point where the 2×4 would sit perfectly.

Now using the drill fix wood screws from the backside of the 2×6. If done correctly the 2×4 should sit perfect and look something like this.
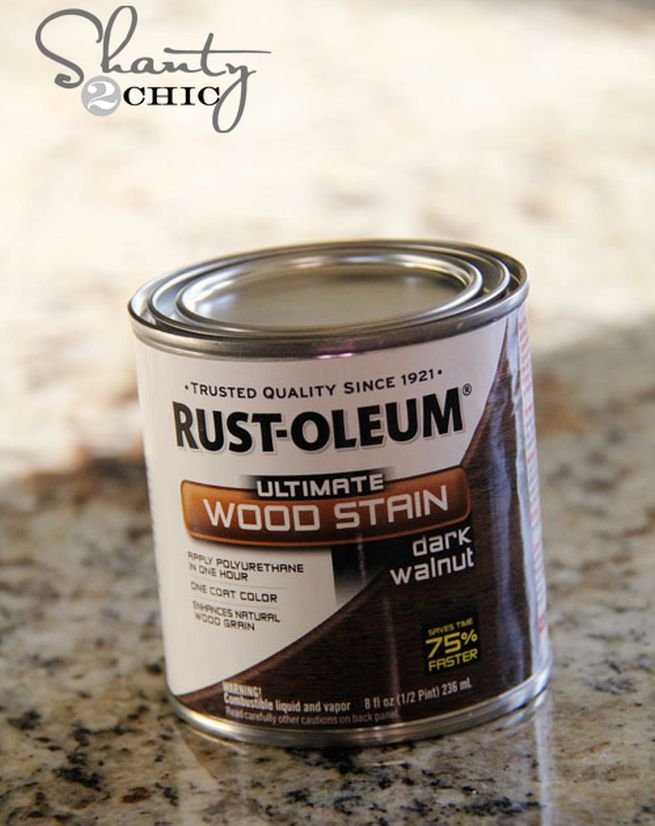
Once you are done attaching all the boards, let your creative juices go wild and give it your most favorite look. We strongly suggest the Rust-Oleum Ultimate Wood Stain in Dark Walnut, for those of you who want to make it look as rustic and old as possible.
Once this finish dries off, feel free to make it look as worned out as you want by using the Ryobi Corner Cat finishing tool.

Your Shanty wine rack is ready to go up the wall. Fix it with the help of the hex screws and it will be all set on the wall. You can also label each front by painting or by making labels and then sticking them on with tape. Try and fix the hex screws with the help of suds or use anchors for sure.

For those of you who are into creating stuff out of scrap or by using your own simple ideas, do have a look at Ryobi Nation .
Next time you create something by running your creative horses wild, do share the idea with us.
Via : Shanty-2-chic


I’d make the label with chalkboard paint…then write in what you have when you have it!